Electric bikes can be a pain in the neck, especially if they don’t start before you hit a ride. Perhaps it’s the charging issues, or maybe the connections are all loose. No matter what the reason is, electric bike batteries not working is nothing new.
So, how to fix when the bike battery does not function or does not light up? Turns out, up to 80% of bike problems are fixable by tweaking loose connections or a quick battery changing.
Other problems like malfunctioning cradles, low voltage, broken brakes, etc., can render batteries useless. In most cases, the battery light turns on, but the connecting pins restrict all power to the controller.
Now the question is, can you fix your electric bike battery? The answer is, yes, you can.
Check below for a complete guide on troubleshooting your electric bike battery and fix it on the go. Let’s dig in.
Which E-bike Batteries Do These Methods Apply to?
Although any battery related troubleshooting is easier with an electric bike with a removable battery, the methods are also applicable for regular bikes with fixed batteries.
So, if you own an efficient bike like Ride1Up LMT’D, Ancheer 26”, or a RadCity 4, things will go easy down the line.
Either way, pulling off these hacks to fix the battery will take a bit of technical knowledge. I recommend starting with the easiest steps of readjusting the cords to replacing the batteries.
E-bike batteries are a version of lithium ion cell clusters, which lose their efficiency after a few years. You can change the cells, but the method is risky, and replacing may be the only solution.
What Are the Most Common Problems With E-bike Batteries?
No matter what type of e-bike you have, they all face the same battery problem. Loose connections come first. Then comes low voltage output, connecting pin malfunction, and so on. Here are the most common problems for e-bike batteries:
E-bike Battery Not Charging
When batteries don’t charge, the final outcome is a dead battery. Sometimes, the problem is related to the charger rather than the battery itself. You can charge the darn thing for hours, but it will hardly do any good.

To check it, connect a multimeter to the positive and negative end of the charger head and see the current flow. If the multimeter reading doesn’t change or fluctuates too much, the charger has gone bad.
Note: You also need to know the right electric bikes charging process before you go ahead and start charging the bike.
Battery Doesn’t Turn On
After checking the charger, make sure whether the battery is good or not. In climates where the temperature falls below freezing, batteries tend to malfunction. The battery stops charging itself and doesn’t turn on.

To check the problem, unplug the battery and try turning it on manually. An LED indicator will let you know if the battery is functional. If you find out that the battery is dead, you better remove the battery and replace it with a new one.
Battery Discharging Fast
In case of a faulty battery, the charge doesn’t last as it should. Sometimes, the battery loses and gains its connection. In other cases, the battery is swelled and seems to be dead, even after hours of charging.

Try measuring the discharge flow with a multimeter. A bad battery will always show a fluctuating outcome. Sometimes, the Battery Management System (BMS) itself had initiated a transient floating voltage to protect the battery from over-discharge.
Voltage Output
Sometimes, the battery fails to give out enough voltage output. Though rare, this problem may happen to old batteries. Take a multimeter and set it to the volt monitoring. Here are the output results of e-bike batteries:
- 27V for a 36V battery
- 35V for a 48V battery
- 38V for the 52V battery
- 44V for a 60V battery
- 55V for a 72V battery
Any reading less than these won’t do you any good.
Connecting Cradle Problem
Your battery is all good, yet, is the damn bike not starting? Well, the cause may be the attachment pins. Ever seen the pins, which connect the electric bike with a removable battery? They are the cradles. Every time you start the bike, sparks appear in those pins, causing the pins to decay.
Check for burnt or loose after detaching the battery from the adjustment part.
Loose or Burnt Wires
Loosen wires are quite common in an electric bike. However, when it happens, you have to open the whole bike up and check it. Start from the wires, connecting the battery to the bike.
Usually, sparks while turning the bike on and off burn overheats the wires and loosens them. You can try replacing the wires as well. This is not a battery problem, rather a technical issue.
Malfunctioning Wire Socket
The connecting wires are housed inside a female-type pin socket. If the wire pins get burnt, the sockets may face the same problem. It’s kinda like an action-reaction formula. You hit one part, and the other faces the induction.
However, these sockets often work even after getting damaged.
How To Troubleshoot Electric Bike Battery Not Working?
The problems of an e-bike battery may not be limited to just the battery itself. Other parts like the display, brakes, and controller cable may stop the battery current flow. So, let’s see how we can completely troubleshoot the battery for a perfectly running bike:
1. Shock/Jumpstart the Battery
If your battery is dead completely, and you can’t start it, try the shock/jumpstart method. Though this process is kinda risky, it works damn fine. All you need is to open the battery cells and shock them individually. Here you will need a variable power supply and good technical hands.
Note: The inexperienced should stay as far away from this technique as possible. In that case, going for a New electric bike battery (product link) is the best way to go with.
2. Check the Voltage (Replace if Necessary)
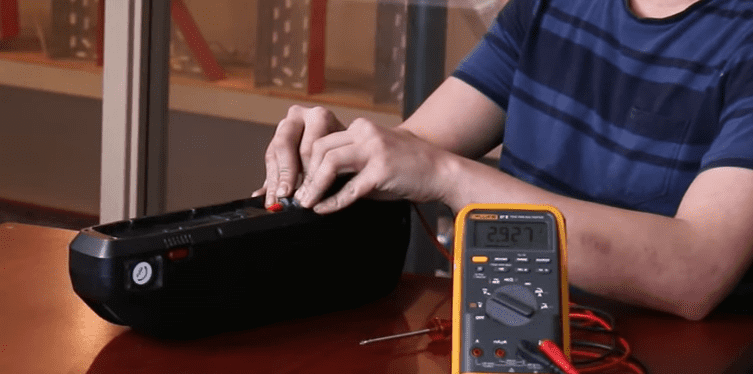
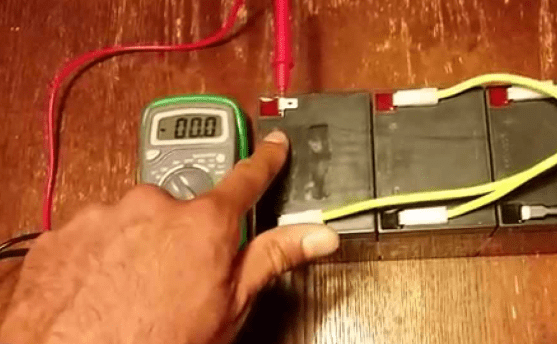
The electric bike won’t turn on if the required voltage isn’t high enough. To check whether the voltage magnitude is enough, use a multimeter. Here are the steps you need to follow:
- First, take a multimeter and set it to volt monitoring.
- Now, attach the two rob cables of the multimeter to the battery output.
- Make sure the attachment is correct, or else the voltage value won’t pop up.
- Now, if the voltage requirement is below average, the battery isn’t functional.
Here is the minimum voltage requirement for e-bike batteries according to capacity:
Battery voltage | Minimal voltage requirement |
72V | 55V |
52V | 38V |
60V | 44V |
48V | 35V |
36V | 27V |
3. Display Change
In most cases, the display is the first culprit for a not working ebike battery. Technically, it is a software error. A faulty display shows a wrong battery reading, which tricks the e-bike to not start. After all, the bike is smart, and replacing the faulty display is the only solution here.
4. Readjust the Controllers
After months of usage, the controller wires may shift from their place. Try pulling all the wires out of their place and readjusting. If the connections are tight, the battery will function properly.
5. Motor Cord Replacement
Similar to the controller wires, the motor cord may loosen up with time. Turn the bike on, and shake the cords. If you see the bike starts for a bit, you should probably replace the motor cord.
6. Fix the Severed Connection
Wires from the battery to the display may also cause the bike battery to not work. To fix it, replace all severed connections and the linings. You may have to cut some wires as some wirings are custom made.
7. Check the Brakes
The brake wires may jam up and block the connection of the battery to the bike. Remove all the wires and readjust the brake cable tension. Try replacing the brake inhibitor as well.
Frequently Asked Questions
How Do I Reset My Ebike Battery?
To reset an e-bike battery, first, you need to remove the battery from the bike. Now, hold the battery power button for 10-20 seconds and release. Your battery will reset and restart itself. Finally, readjust it on the bike.
How Do You Troubleshoot an Ebike Battery?
Troubleshooting an e-bike battery is easy work. All you need to do is follow these things below:
- Restart the battery
- Check for faulty wiring
- Readjust all the adjustment pins
- Tighten all the wires
- Replace all the malfunctioning wire socket
- Check the voltage output
- Jumpstart the battery
- If nothing works, replace the darn thing
Can Electric Bike Batteries Be Repaired?
Electric bikes have lithium battery cells, which can hardly be fixed. However, if you can replace any faulty cells, you will repair the battery as a whole.
How Do You Test an Ebike Battery?
To test an eBike battery, you need to have a multimeter and a steady hand. If you don’t know how batteries work, please don’t try testing them. Now, follow the steps below:
- First, set the multimeter settings to volt monitoring.
- Now, attach the two electrodes of the voltmeter to the battery output.
- If your connection is correct, the reading will show.
- When you have a voltage output somewhat similar to the battery capacity, the battery is fine.
How Long do e-bike Batteries Last?
With proper care, an e-bike battery will last for 2-4 years at least. However, with freezing temperatures, this time will decrease to about 2 years. Then again, lithium-ion batteries lose their efficiency to about 10-15% every year.
How Do You Jumpstart an Electric Bike Battery?
Jumpstarting an electric bike battery is easy if you are a professional. Have you seen shocking mobile batteries to fix them? Well, the same thing happens here. Connect a power supply to the input of the battery and hold it for a second or two.
Note: To avoid explosions, please wear protective gear. After all, Li-ion batteries are highly flammable.
Final Verdict
I hope that you have figured out the right way to get your electric bike battery fixed. I have covered everything responsible for e-bike battery malfunction. If you still find the electric bike battery not working, replacement is the only option.
Our advice is to start with the minimal remedies to the higher ones. The battery isn’t always faulty on an e-bike. Fix the connections properly, and voilà!
Bye for today. Leave a comment for any additional info. Have a good day.
